So after reading the manuals and postings I tore my dads mod 8 apart since it had not been cleaned in 20 years...
All the crud is out and re lubed. Thought I had it back together since the inscuctions state the parts are designed to only go in ONE WAY. well I can seem to get it to work. It seems that the problem is the spring and all "online" and 2nd party instructions seem to omit a good view of the guts in the proper place,
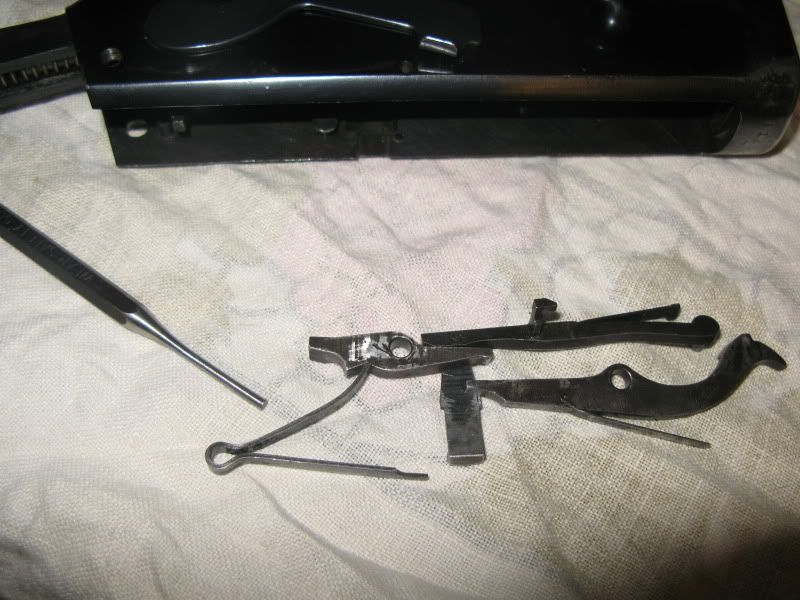
The punch is pointing to the suspect spring i figure it is that or the "sear" above it.
What the heck am I doing wrong....
I've been hanging around here awhile but have not gone inside, as I was afraid I'd end up where you are (had to have a gunsmith put a Winnie back together for me a few years ago). Will be interesting to see what the "smithies" say.
BTW, welcome to the forum.
Though defensive violence will always be “a sad necessity” in the eyes of men of principle, it would be still more unfortunate if wrongdoers should dominate just men. - St. Augustine
your arrangement looks correct, make sure the bottom part of the spring (bolt carrier latch spring) you're pointing to rests against the pin inside of the receiver. Here's a better picture,
Attachments
MODEL 8 INTERNALS RESIZE.jpg (34.95 KiB) Viewed 6065 times
Welcome to the forum. You have the parts laid out in the proper orientation. The issue is getting the spring that you are pointing to with the punch in place without it slipping off the sear. I have tried several ways and the one that works best for me is this. Put all the pieces in place leaving the spring for last. With the pieces in place I place the spring on its pin and only press it down about half way. You have to hold the sear in a down position inorder for the spring to engage the sear. press the bottom of the spring toward the retaining pin, slip the notch part of the spring over the pin and then press the spring firmly down onto its pin. If you do not hold the sear down, the upper part of the spring will slip off the sear and you have to retry again. By holding the spring half way up on its pin will allow you to lift the notch end of the spring over the retaining pin.
It is fairly easy after you do it a couple of times. I am sure there are other methods, but I have found this to be the quickest. If you are not careful in putting the spring over the pin, you may break a thumb nail. I hope this helps.
So I found my mistake......
Tried to get action to work with the barrel off.
whilst waiting to get message approved i did some more tweaking.
popped the barrel on and viola!
but thanks for the posts...
great info! and alot of posts in a little bit of time.
Have a few ? but will post in different section.
Thanks AGAIN!
Has any one done any trigger work on this?
I stoned some of the parts "a tad" on rails and such.
i also went through about a lb of rags and 20-30 q tips
used froglube to CLP after degreasing .
Action is 100% better but since it had had not been cleaned in 20yrs it is not saying much.